
OpenLLM provides a fully OpenAI-compatible API, allowing you to integrate powerful AI models into your applications, agents, IDEs, and third-party clients within minutes.
Before getting started:
Sign in to OpenLLM
Navigate to API Keys
Create a new API Key
Click Use Key
Copy your:
API Key
Base URL
For detailed documentation, please visit:
Method 1: Integrate with Code (Recommended for Developers)
If you're a developer, the fastest way to get started is by using the OpenAI SDK or any framework that supports OpenAI-compatible APIs.
OpenLLM is fully compatible with the OpenAI API specification, so no additional adaptation is required.
Python
from openai import OpenAI

client = OpenAI(
    api_key="YOUR_API_KEY",
    base_url="YOUR_BASE_URL"
)

response = client.chat.completions.create(
    model="gpt-5.5",
    messages=[
        {
            "role": "user",
            "content": "Hello"
        }
    ]
)

print(response.choices[0].message.content)
Node.js
import OpenAI from "openai";

const client = new OpenAI({
  apiKey: "YOUR_API_KEY",
  baseURL: "YOUR_BASE_URL"
});

const response = await client.chat.completions.create({
  model: "gpt-5.5",
  messages: [
    {
      role: "user",
      content: "Hello"
    }
  ]
});

console.log(response.choices[0].message.content);
cURL
curl -X POST "YOUR_BASE_URL/chat/completions" \
  -H "Authorization: Bearer YOUR_API_KEY" \
  -H "Content-Type: application/json" \
  -d '{
    "model": "gpt-5.5",
    "messages": [
      {
        "role": "user",
        "content": "Hello"
      }
    ]
  }'
Perfect for:
AI Agents
MCP Servers
Internal Tools
SaaS Applications
Workflow Automation
Custom AI Products
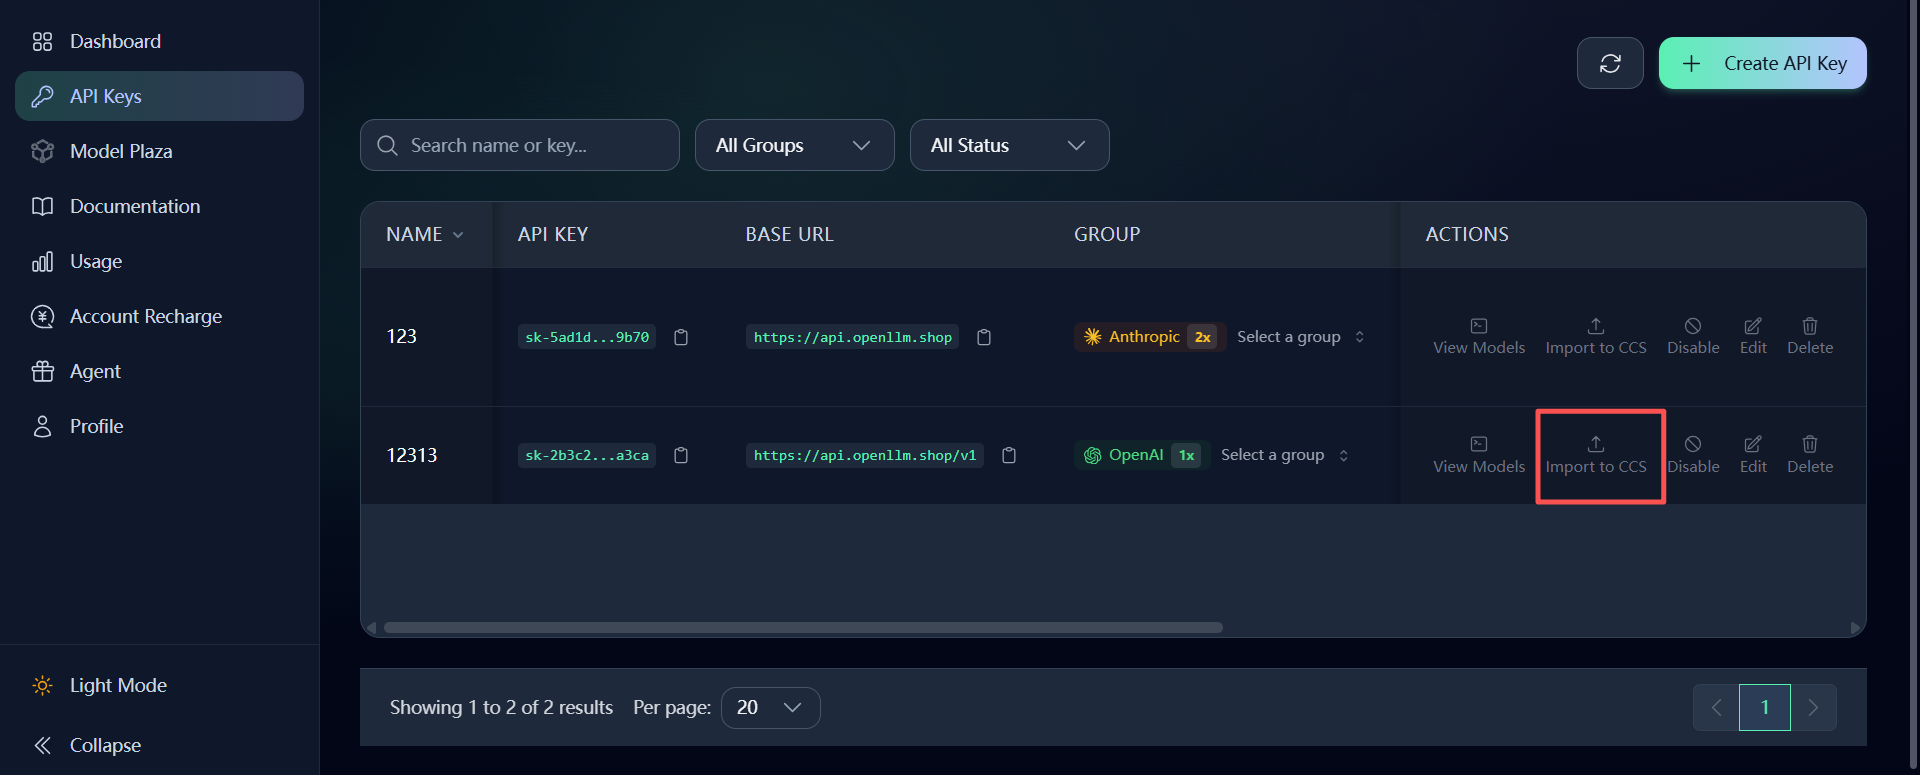
Method 2: One-Click Import via CC Switch
If you have CC Switch installed, you can configure OpenLLM in seconds without manually copying credentials.
Navigate to:
API Keys → Import to CCS
Click the Import to CCS button and OpenLLM will automatically transfer:
API Key
Base URL
Provider Configuration
No manual setup required.
Recommended for:
Claude Code
Cursor
VS Code AI Extensions
CC Switch Users
AI Power Users
Method 3: Connect OpenLLM to OpenClaw, Hermes, and Other AI Clients
OpenLLM works with virtually any application that supports OpenAI-compatible APIs.
Examples include:
OpenClaw
Hermes
OpenCode
Cherry Studio
NextChat
LobeChat
Open WebUI
Roo Code
Cline
Custom OpenAI-Compatible Clients
Simply fill in the following configuration:
API Key
YOUR_API_KEY
Base URL
YOUR_BASE_URL
Model
gpt-5.5
Save the configuration and start chatting immediately.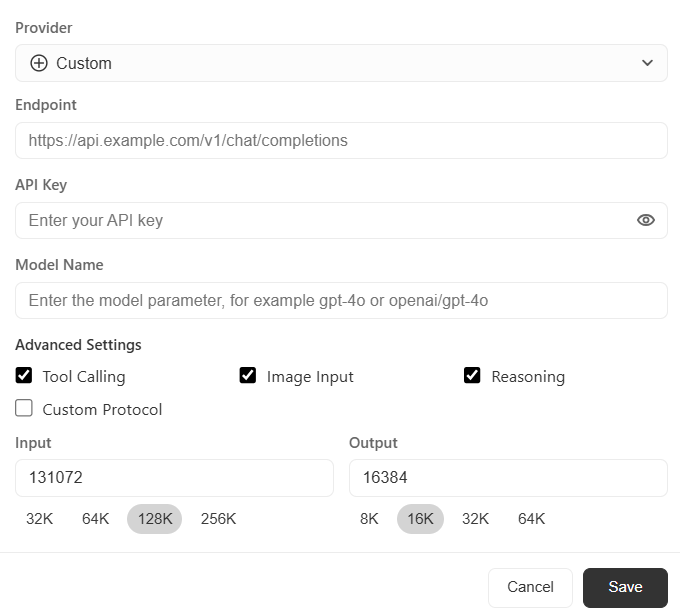
Example: OpenClaw Configuration
openclaw config set providers.openllm.baseUrl "YOUR_BASE_URL"
openclaw config set providers.openllm.apiKey "YOUR_API_KEY"
Then select your preferred model and begin using OpenLLM.
Why OpenLLM?
✅ OpenAI-Compatible API
✅ GPT-5.5 Support
✅ Claude Models
✅ Gemini Models
✅ DeepSeek Models
✅ Agent & MCP Ready
✅ IDE Integration
✅ Unified Billing & Management
✅ Enterprise-Grade Reliability
Need Help?
Official Documentation:
If you encounter any issues during setup, feel free to join the OpenLLM community for support and discussions.
Happy building with OpenLLM 🚀